3 Inch Drawer Pulls: Complete Selection & Installation
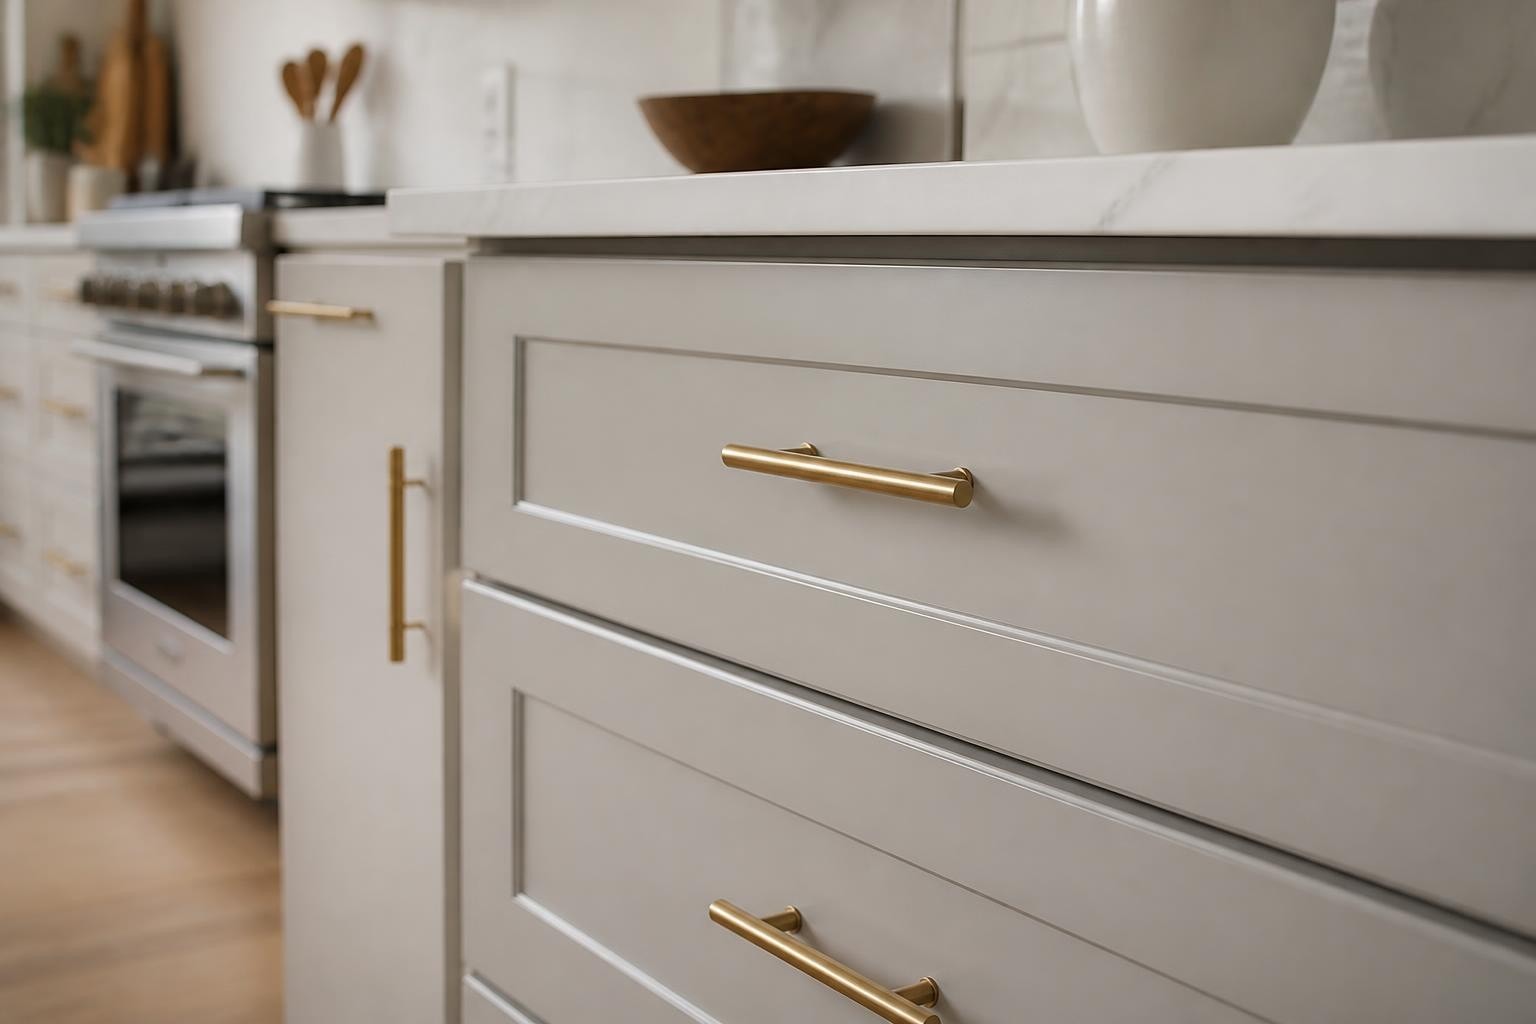
Selecting the right drawer hardware transforms both the functionality and aesthetic appeal of any cabinetry project. Among the most versatile and widely used options, 3 inch drawer pulls strike an ideal balance between visual presence and practical ergonomics. This measurement refers to the center-to-center distance between mounting holes, and understanding how to properly select, measure, and install these pulls ensures professional results whether you're updating a single kitchen drawer or outfitting an entire home. For homeowners, cabinet makers, and installers throughout the Western Cape, mastering the fundamentals of this standard hardware size opens up countless design possibilities while maintaining the functional integrity that quality cabinetry demands.
Understanding the 3-Inch Center-to-Center Standard
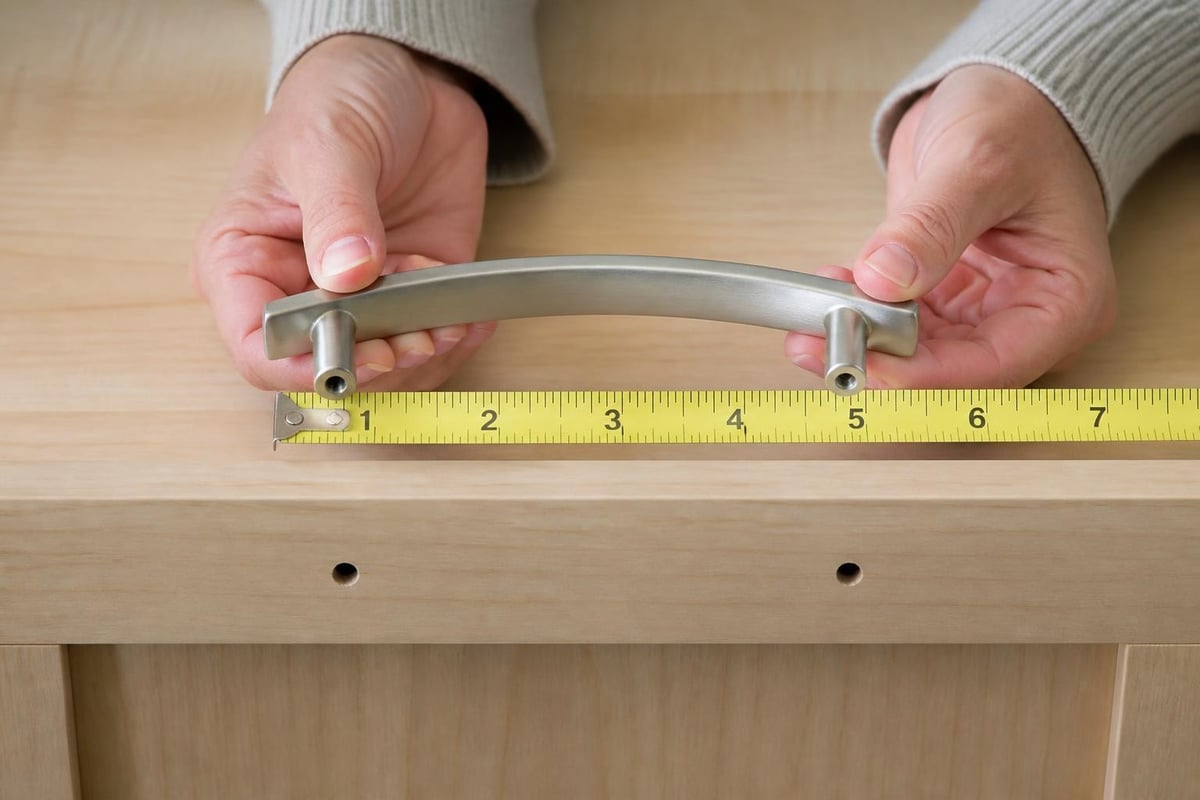
The term "3 inch drawer pulls" specifically refers to the spacing between the two mounting points on a bar-style pull, measured from the center of one screw hole to the center of the other. This standardized measurement system ensures compatibility across manufacturers and simplifies replacement projects.
Why This Measurement Matters
Understanding center-to-center (C-to-C) measurement prevents costly installation mistakes and wasted materials. When you purchase hardware labeled as 3-inch, the overall length of the pull typically extends beyond this dimension. A pull with 3-inch boring might measure 4 to 5 inches in total length, depending on the design and end-cap style.
Professional installers and cabinet makers rely on this standardization when drilling holes during initial construction or when retrofitting existing cabinetry. The NKBA's Kitchen & Bath Planning Guidelines establish industry standards for hardware placement that directly influence which pull sizes work best in specific applications.
Key measurement distinctions include:
- Center-to-center distance (the standard specification)
- Overall pull length (aesthetic footprint)
- Projection from drawer face (clearance consideration)
- Base diameter or width (visual weight)
For practical application in real-world projects, detailed measurement guides demonstrate exactly how to measure existing holes, mark new positions, and verify spacing before drilling.
Ideal Applications for 3-Inch Pulls
Determining where 3 inch drawer pulls work best requires considering both drawer dimensions and overall design proportions. This size excels in mid-sized drawer applications where smaller knobs would look undersized and larger pulls would overwhelm the drawer face.
Drawer Width Recommendations
The most harmonious installations pair pull size with drawer width using established proportion guidelines. According to professional sizing recommendations, 3-inch pulls typically work best on drawers measuring 12 to 24 inches wide.
| Drawer Width | Recommended Pull Size | Visual Balance |
|---|---|---|
| 6-12 inches | 2-3 inches | Single centered pull or knob |
| 12-18 inches | 3-4 inches | Proportional, centered placement |
| 18-30 inches | 3-5 inches | Standard or dual pull options |
| 30+ inches | 5-6 inches or dual | Substantial hardware required |
Kitchen applications commonly feature this pull size on:
- Standard base cabinet drawers
- Vanity bathroom drawers
- Desk and office furniture drawers
- Pantry pull-out drawers
- Bedroom dresser drawers
The versatility of 3 inch drawer pulls makes them particularly popular for projects requiring visual consistency across multiple room types. A single hardware style in this size can unify kitchen, bathroom, and built-in storage throughout a home while maintaining appropriate scale in each location.
Placement Considerations
Proper positioning enhances both aesthetics and ergonomics. For cabinet hardware placement, professionals typically center 3-inch pulls horizontally on drawer faces and position them 2.5 to 3 inches from the top edge. This placement aligns with natural hand position when opening drawers and creates visual consistency across multiple drawer banks.
Material and Finish Selection
The durability and appearance of 3 inch drawer pulls depend heavily on material composition and surface treatment. Professional-grade hardware uses specific metals and finishes engineered to withstand thousands of daily interactions while maintaining aesthetic appeal.
Common Material Options
Stainless steel leads in commercial and high-use residential applications due to superior corrosion resistance and structural integrity. The material naturally resists fingerprints better than many alternatives and maintains its finish without special coatings.
Zinc alloy provides an economical foundation for most residential hardware. When properly finished, zinc-based pulls deliver excellent durability at accessible price points. The comparison between zinc-plated and stainless steel reveals important trade-offs in weight, cost, and longevity that inform selection decisions.
Solid brass offers traditional elegance and develops a natural patina over time. While heavier and more expensive than alternatives, brass hardware communicates quality through both weight and warm metallic luster.
Aluminum serves modern and contemporary designs with lightweight construction and clean finishes. Though softer than steel or brass, aluminum resists corrosion and accepts anodized finishes that add color options beyond traditional metallics.
Finish Durability Factors
Surface treatment determines how 3 inch drawer pulls age in real-world conditions. According to professional finish guides, the most durable finishes use physical vapor deposition (PVD) or powder coating rather than simple plating.
- PVD finishes: Bond molecularly to base metal, resisting scratches, tarnish, and chemical cleaners
- Powder coating: Provides thick, even coverage with excellent chip resistance
- Electroplating: Traditional chrome, nickel, and brass plating with moderate durability
- Living finishes: Intentionally age and patina, showing use as part of design intent
Kitchen and bathroom environments present particular challenges. Heat, moisture, grease, and cleaning chemicals all accelerate finish degradation. Research on kitchen cabinet handle finishes demonstrates that matte black PVD and brushed stainless consistently outperform traditional polished finishes in maintaining appearance over time.
Installation Techniques and Best Practices
Achieving professional results with 3 inch drawer pulls requires precision during template creation, drilling, and final mounting. Even minor alignment errors become visually obvious when multiple drawers sit side by side, making careful planning essential.
Template and Jig Systems
The most reliable installations use dedicated hardware jigs that ensure consistent hole placement across multiple drawers. For those working on larger projects or professional installations, investing in quality cabinet hardware jigs eliminates measurement variables and dramatically reduces installation time.
Manual template approach:
- Create a master template from hardboard or acrylic
- Mark center points at 3-inch spacing
- Add reference edges for consistent drawer positioning
- Drill pilot holes through template material
- Use template as guide for each drawer face
Professional jig method:
- Set adjustable jig to 3-inch center-to-center
- Position jig using built-in reference points
- Drill through hardened jig bushings
- Move to next drawer without remeasurement
- Achieve perfect consistency across project
Drilling and Hardware Installation
Proper drilling technique prevents splintering, cracking, and misalignment. Use sharp brad-point or Forstner bits sized appropriately for the machine screws supplied with your hardware.
For standard 3 inch drawer pulls with 8-32 machine screws, drill 9/64-inch pilot holes. When working with hardwoods or finished drawer fronts, drill from the face side through to prevent tearout on the visible surface.
Installation sequence:
- Verify drawer face orientation before drilling
- Use painter's tape on drill bit to mark depth
- Drill pilot holes perpendicular to drawer face
- Test-fit pull before final tightening
- Hand-tighten screws using appropriate driver
- Verify alignment before moving to next drawer
The professionals at JM Cabinet Solutions stock quality 3-inch drawer pulls from trusted international brands, along with the installation hardware and technical guidance needed to achieve flawless results on any cabinetry project throughout the Helderberg and Western Cape region.
Design Styles and Aesthetic Options
Beyond functional specifications, 3 inch drawer pulls serve as jewelry for cabinetry. The design language you select influences the entire aesthetic personality of a kitchen, bathroom, or furniture piece.
Contemporary and Modern Styles
Clean lines and minimal ornamentation define modern pull designs. Bar pulls with square or rectangular profiles, tubular European designs, and angular geometric shapes dominate contemporary installations.
Popular modern characteristics:
- Straight linear forms without decorative detail
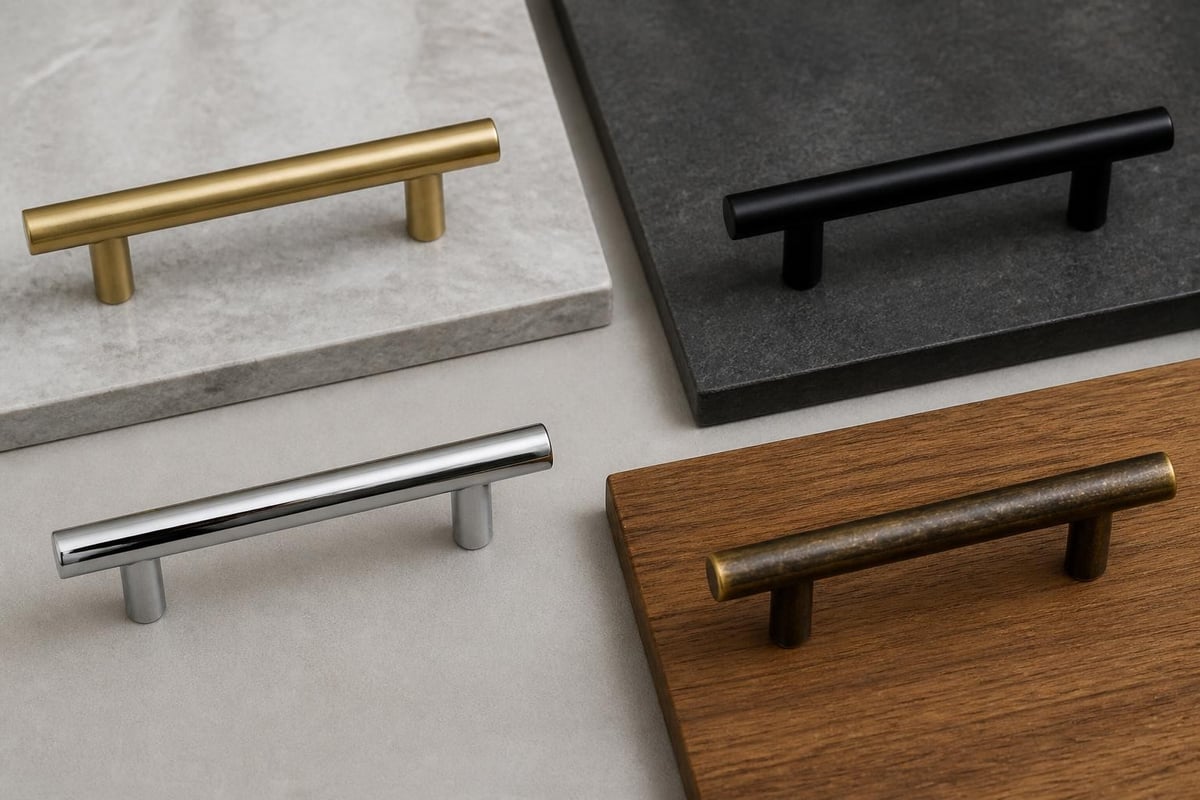
- Matte black, brushed nickel, or polished chrome finishes
- Consistent diameter along entire pull length
- Hidden fastener designs for seamless appearance
These styles pair effectively with slab-front cabinets, handleless designs, and minimalist kitchen aesthetics. The 3-inch scale provides sufficient visual presence without introducing unnecessary detail that conflicts with minimalist principles.
Traditional and Transitional Options
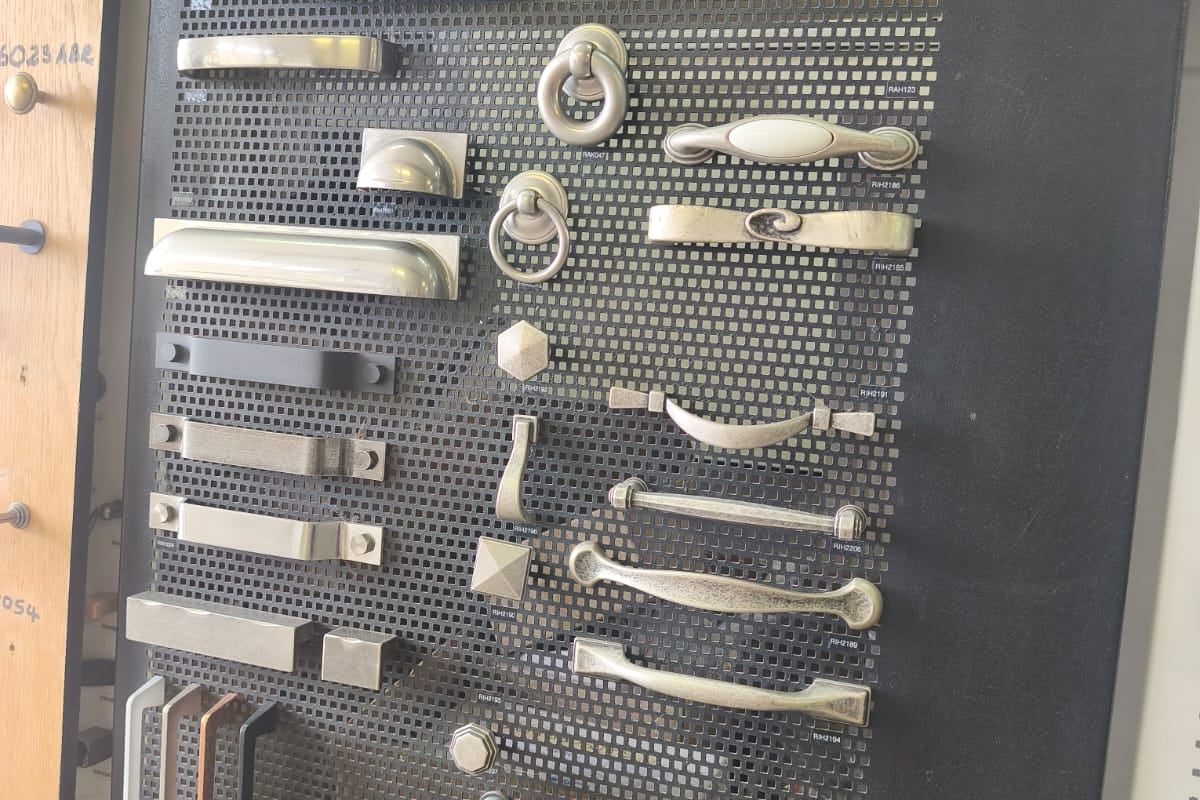
Classic design vocabularies embrace decorative ends, curved profiles, and ornamental details. Cup pulls, bail pulls, and designs incorporating traditional motifs bring historical reference to cabinetry projects.
| Style Category | Common Features | Best Applications |
|---|---|---|
| Traditional | Ornate ends, curved profiles, antique finishes | Period kitchens, formal furniture |
| Transitional | Simplified classic forms, mixed finishes | Updated traditional spaces |
| Farmhouse | Simple bars, bin pulls, aged finishes | Rustic and country kitchens |
| Industrial | Raw metal, exposed fasteners, utilitarian forms | Loft-style and urban spaces |
Transitional designs bridge contemporary and traditional aesthetics, often featuring simplified classic forms rendered in modern finishes. This category has gained significant popularity among homeowners seeking timeless appeal without heavy period styling.
Mixed Metal Approaches
The trend toward mixed metal finishes allows greater design flexibility while maintaining cohesion. Strategies for combining different metal finishes in a single space include varying hardware finish while maintaining consistent pull size and style throughout.
When using 3 inch drawer pulls as part of a mixed metal scheme, maintain the same center-to-center measurement across all finishes. This creates unity through proportion even when finish colors vary between warm brass, cool chrome, and neutral black elements.
Maintenance and Long-Term Care
Preserving the appearance and function of 3 inch drawer pulls requires understanding how different materials and finishes respond to cleaning products and daily use. Proper maintenance extends hardware life and maintains visual appeal for decades.
Cleaning Recommendations by Finish Type
Stainless steel and chrome: Clean with mild dish soap and water, dry immediately to prevent water spots. Avoid abrasive cleaners that scratch protective surfaces. For fingerprint-resistant finishes, use microfiber cloths dampened with water only.
Oil-rubbed bronze and living finishes: These intentionally age and patina. Clean with soft, damp cloth only. Never use chemical cleaners or polishes that remove the developed patina. The changing appearance represents the intended aesthetic evolution.
Matte black and powder-coated finishes: Gentle cleaning with pH-neutral cleaners preserves the surface. Avoid alkaline or acidic cleaners that etch powder coating. Most manufacturers recommend simple soap and water for routine maintenance.
Polished brass and gold-tone finishes: Use brass-specific cleaners or a paste of lemon juice and baking soda for uncoated brass. Lacquered brass requires only gentle dusting and occasional damp-cloth cleaning to prevent coating damage.
Addressing Common Issues
Over time, even quality hardware may require attention. Loose screws typically indicate either inadequate initial tightening or wood compression around the fastener. Remove the pull, add a drop of thread-locking compound to the screw threads, and reinstall.
For pulls showing finish wear, identify whether the degradation results from:
- Chemical exposure (harsh cleaners)
- Physical abrasion (repeated contact)
- Environmental factors (moisture, heat)
- Manufacturing defect (inadequate coating)
Minor finish imperfections on 3 inch drawer pulls sometimes respond to manufacturer-specific touch-up products. More significant damage typically requires complete hardware replacement, emphasizing the importance of selecting durable finishes initially.

Retrofitting Existing Cabinetry
Updating existing drawers with new 3 inch drawer pulls presents unique challenges when previous hardware used different boring patterns. Several approaches address mismatched hole spacing while maintaining professional appearance.
Matching Existing Hole Patterns
Before purchasing new hardware, measure the exact center-to-center distance of existing holes. If previous pulls measured close to 3 inches (within 1/8 inch), new hardware may accommodate the variation. Many manufacturers design mounting plates with slight adjustment tolerance.
When existing holes match closely:
- Test-fit new pulls before removing old hardware
- Verify screw length accommodates drawer thickness
- Check that new pull width covers old hardware shadows
- Install and evaluate appearance before committing to full project
Filling and Redrilling Strategy
When existing holes don't align with new 3-inch spacing, professional results require filling old holes and drilling new positions. This approach works best when changing from knobs to pulls or when previous pulls used significantly different measurements.
Hole-filling process:
- Remove all existing hardware completely
- Fill holes with matching wood filler or wood plugs
- Sand filled areas flush when fully cured
- Touch up finish to match surrounding drawer face
- Create template for new 3-inch hole positions
- Drill new pilot holes using template or jig
For painted cabinetry, color-matched filler and touch-up paint create invisible repairs. Stained or natural wood drawers present more challenges, sometimes requiring complete drawer face replacement or strategic hardware positioning that conceals old holes behind new pull bases.
Coordinating with Other Cabinet Hardware
Successful cabinetry projects maintain visual relationships between different hardware types. When using 3 inch drawer pulls, door hardware requires thoughtful selection to create cohesive design language throughout the space.
Pulls and Knobs on Doors
Kitchen and bathroom cabinets typically combine drawer pulls with door knobs or smaller door pulls. The relationship between these elements influences overall design harmony.
Coordination strategies include:
- Using identical finish across all hardware types
- Maintaining consistent design style (modern, traditional, transitional)
- Scaling door hardware proportionally to drawer pulls
- Selecting complementary rather than identical door hardware
For door cabinets adjacent to drawers equipped with 3 inch drawer pulls, knobs between 1.25 and 1.5 inches in diameter maintain appropriate scale relationships. Alternatively, smaller bar pulls in the 2-inch to 2.5-inch range create family resemblance while accommodating the different operation of doors versus drawers.
Integration with Functional Hardware
Complete cabinet systems incorporate numerous hardware components beyond visible pulls and knobs. Drawer slides, hinges, and internal organizers all contribute to overall functionality, and their quality level should match the investment in finish hardware.
Professional installations often pair quality drawer pulls with soft-close drawer systems that prevent slamming and extend hardware life. When researching cabinet installation details, consider how visible hardware selections integrate with concealed functional components for comprehensive project success.
Selecting and installing 3 inch drawer pulls successfully combines precise measurement, quality material selection, and attention to design proportion. Whether updating a single bathroom vanity or outfitting a complete kitchen renovation, understanding center-to-center spacing, appropriate applications, and professional installation techniques ensures results that enhance both function and aesthetic appeal for years to come. The team at JM Cabinet Solutions provides the quality hardware, trusted brands, and expert guidance needed to complete your cabinetry project with confidence throughout the Helderberg and Western Cape region.


Comments
Post a Comment