Inset Door Hinges: Complete Installation & Selection Guide
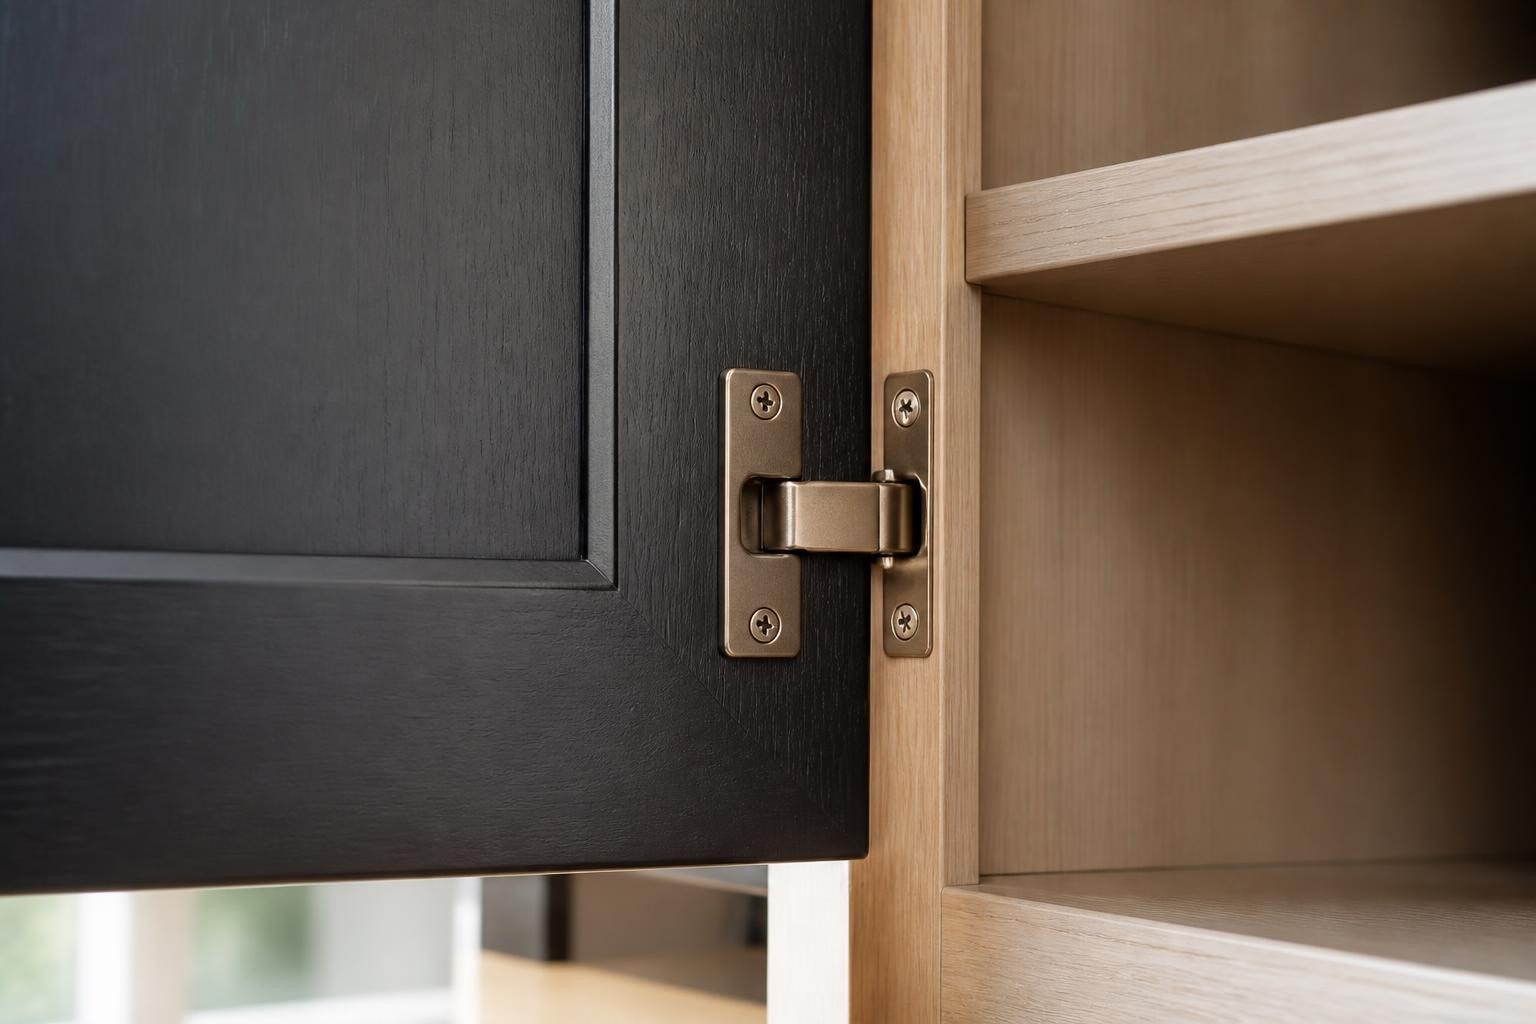
Inset door hinges represent a sophisticated hardware choice that enables cabinet doors to sit flush within the cabinet frame, creating a clean, traditional aesthetic that has stood the test of time. Whether you're a professional cabinet maker, kitchen installer, or DIY homeowner in the Western Cape, understanding the selection, installation, and adjustment of these precision components is essential for achieving flawless results. This comprehensive guide explores everything from basic mechanics to advanced installation techniques, helping you make informed decisions for your next cabinetry project.
Understanding Inset Door Hinge Mechanics
The fundamental difference between inset door hinges and other hinge styles lies in how the door positions relative to the cabinet frame. Unlike overlay hinges where doors cover the frame, inset configurations require the door to sit entirely within the opening.
This flush-mount approach demands precision in both manufacturing and installation. The hinge mechanism must account for the minimal clearance between door and frame while providing smooth operation and adequate support. Cabinet hinges come in various styles, each designed for specific applications and aesthetic preferences.
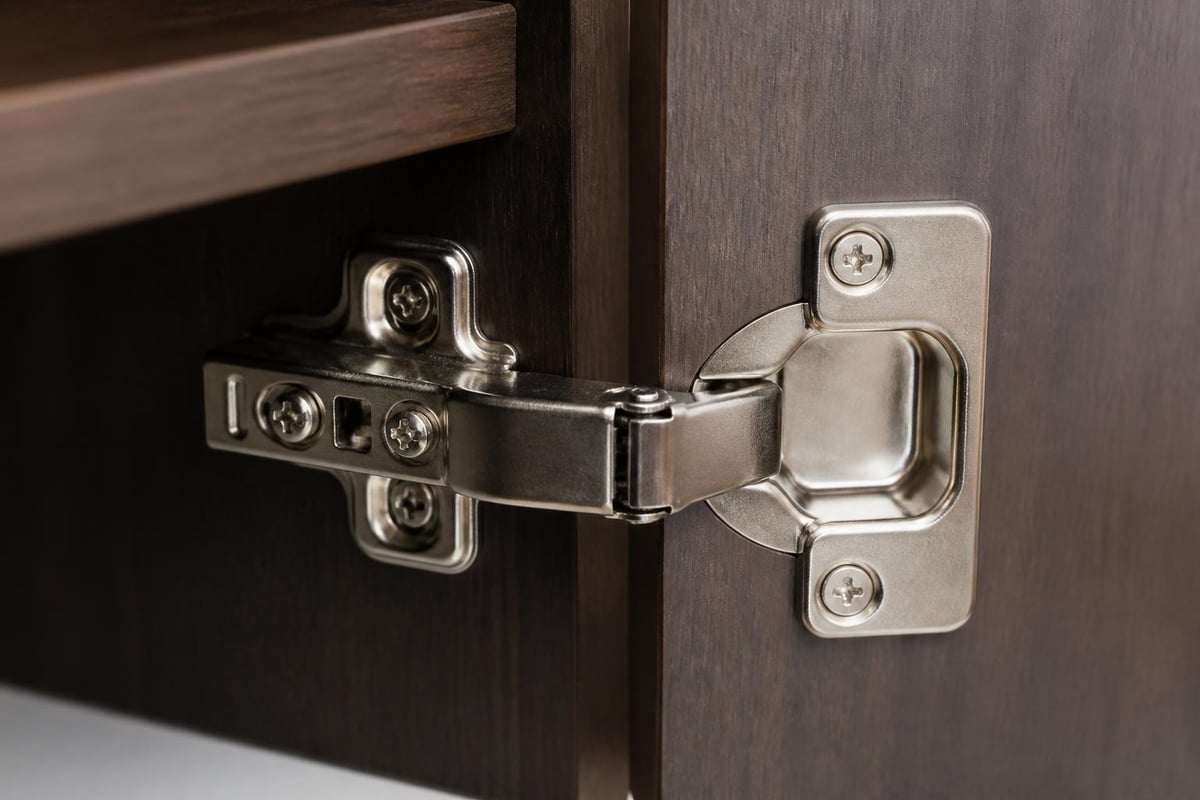
Key Components and Their Functions
Every inset door hinge system comprises several critical elements that work together:
- Hinge body: Mounts to the cabinet frame and provides structural support
- Hinge arm: Connects the door to the frame, controlling the swing arc
- Mounting plates: Enable precise adjustment after installation
- Screw bosses: Provide secure attachment points for screws
- Spring mechanism: Controls door movement and closing force
The quality of these components directly impacts performance. Premium hinges feature hardened steel construction, corrosion-resistant finishes, and engineered spring systems that maintain tension over thousands of cycles.
Types of Inset Door Hinges for Different Applications
Selecting the right hinge type depends on door weight, thickness, cabinet configuration, and desired functionality. Professional installers must consider multiple factors before specifying hardware.
Standard Inset Hinges
Traditional butt hinges remain popular for face-frame cabinets where visible hardware complements the design. These surface-mounted options come in various finishes including brass, chrome, and oil-rubbed bronze. They work best with lighter doors and applications where aesthetic presence is desired.
| Hinge Type | Weight Capacity | Door Thickness | Visibility | Best Application |
|---|---|---|---|---|
| Butt Hinge | Light to Medium | 16-22mm | Fully Visible | Traditional face-frame |
| Concealed Euro | Medium to Heavy | 16-25mm | Hidden | Modern frameless |
| Semi-Concealed | Medium | 16-22mm | Partially Visible | Face-frame transition |
| Thick Door Inset | Heavy | 25-35mm | Hidden | Premium applications |
Concealed European-Style Hinges
Modern inset cabinet hinges offer hidden mounting and extensive adjustability. These cup-style hinges install in a 35mm bore on the door's interior, connecting to a mounting plate on the cabinet frame.
European hinges provide three-dimensional adjustment capability. Installers can modify height, depth, and lateral position without removing the door. This flexibility proves invaluable when aligning multiple doors or compensating for cabinet variations.
Premium manufacturers integrate soft-close mechanisms directly into the hinge body. Blum's BLUMOTION technology exemplifies this approach, providing silent, controlled closing without additional dampers.
Specialized Configurations
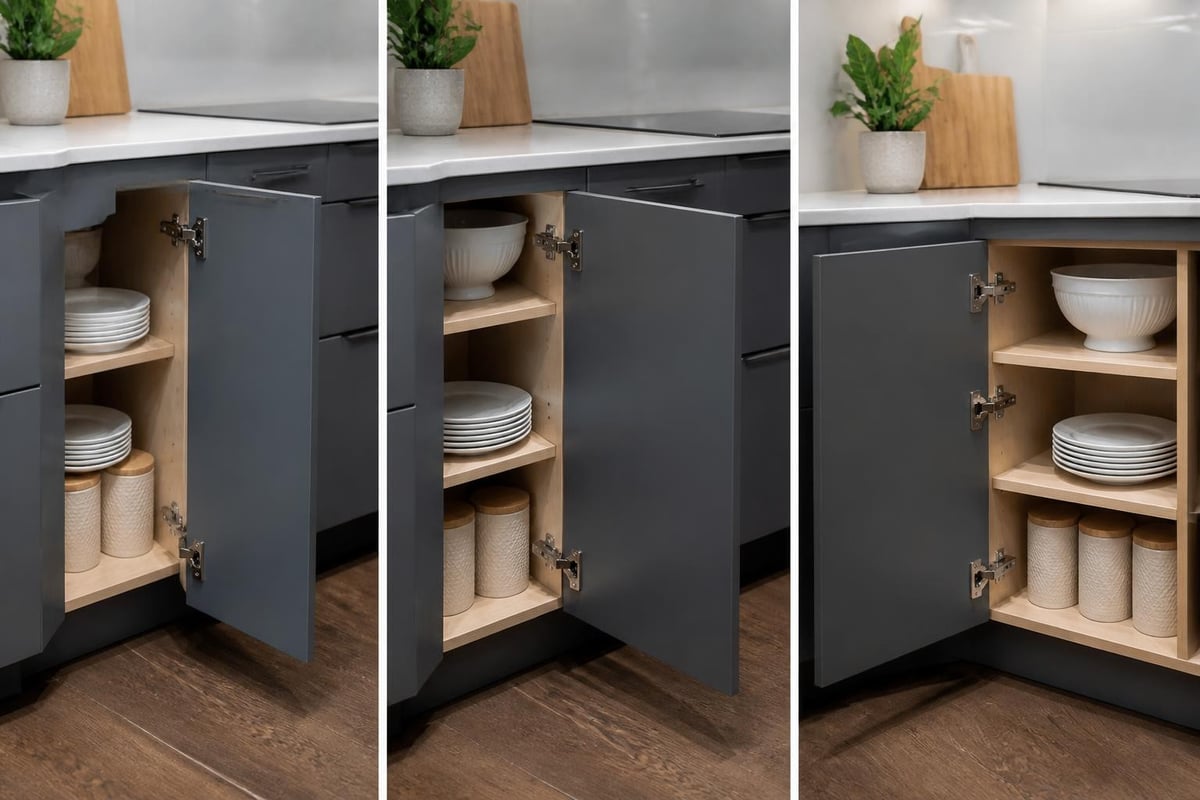
Corner cabinets and unique layouts require specialized inset door hinges. Blind corner applications demand hinges with extended opening angles, allowing doors to clear adjacent surfaces.
Salice's SILENTIA+ series addresses these challenges with integrated soft-close and crampon mounting for secure attachment. The 105-degree opening option accommodates smaller, lighter doors in compact spaces.
Critical Selection Criteria for Professional Results
Choosing appropriate inset door hinges requires systematic evaluation of project requirements. Mismatched hardware leads to sagging doors, binding, and premature failure.
Load-Bearing Capacity
Door weight determines hinge quantity and specification. Calculate total door weight including glass panels, solid wood construction, or MDF core materials. Most manufacturers provide weight ratings per hinge, allowing precise calculation.
As a general guideline:
- Doors under 5kg: Two hinges minimum
- Doors 5-10kg: Three hinges recommended
- Doors 10-15kg: Four hinges or heavy-duty specification
- Doors over 15kg: Consult manufacturer specifications
Door thickness impacts hinge selection significantly. Standard concealed hinges accommodate doors 16-22mm thick. Thicker doors require specialized models with extended mounting depth and reinforced construction.
Opening Angle Requirements
Standard inset door hinges provide 95-degree opening, suitable for most applications. Full-access requirements in pantries or tall cabinets may need 110-degree or greater opening angles.
Consider adjacent walls, appliances, and traffic patterns. Restricted opening angles create user frustration and limit cabinet accessibility. Detailed installation guides help evaluate spatial constraints before hardware selection.
Professional Installation Techniques
Proper installation of inset door hinges demands precision measurement, quality tools, and systematic approach. The tight tolerances inherent in inset construction leave little room for error.
Essential Tools and Materials
Professional installers maintain dedicated tool kits for hinge installation:
- 35mm Forstner bit for European-style cup boring
- Drilling jig for consistent cup placement
- Self-centering drill bits for pilot holes
- Cabinet door clamps or positioning jigs
- Precision measuring tools (calipers, squares)
- Screwdrivers matching hinge screw heads
Quality drilling equipment prevents tear-out and ensures accurate cup depth. Variable-speed drills provide control during boring operations.
Step-by-Step Installation Process
Begin by verifying door and frame dimensions. Inset doors require precise sizing with typically 1.5-2mm clearance on all sides. This gap accommodates wood movement and prevents binding.
- Mark hinge positions on the door, typically 100mm from top and bottom edges
- Bore hinge cups to specified depth (usually 12-13mm) using jig for consistency
- Install hinge bodies in cups, ensuring proper orientation
- Mount base plates on cabinet frame at corresponding locations
- Attach door to frame by clipping hinge arms onto base plates
- Perform initial adjustment to achieve even gaps around door perimeter
Complete installation instructions provide detailed measurements and troubleshooting guidance for common challenges.
Common Installation Errors to Avoid
Even experienced installers encounter issues with inset door hinges. Awareness prevents costly mistakes:
- Inconsistent cup depth: Causes door to sit proud or recessed
- Misaligned mounting plates: Creates diagonal gaps and binding
- Insufficient pilot holes: Leads to wood splitting and weak attachment
- Over-tightening screws: Strips threads and damages mounting surfaces
- Neglecting grain direction: Affects screw holding power in solid wood
Adjustment and Alignment Procedures
The true value of quality inset door hinges emerges during adjustment. Three-dimensional capability allows perfect alignment even when cabinets aren't perfectly square.
Height Adjustment
Vertical positioning moves the door up or down relative to the frame. Loosen the mounting plate screws slightly and shift the plate vertically. This adjustment corrects uneven reveals at top and bottom.
Most systems provide 2-3mm total adjustment range. If greater correction is needed, remount the base plate rather than maximizing adjustment limits.
Depth Adjustment
The eccentric screw on the hinge arm controls how far the door sits from the cabinet frame. Turning this screw pulls the door tighter against the frame or allows it to project outward.
This adjustment proves critical in inset applications. The door must sit flush with the frame face without binding against the opening. Typically 0.5-1mm clearance provides optimal results.
Lateral Adjustment
Side-to-side movement centers the door within the opening. Loosen the hinge arm attachment and slide the door laterally. This corrects uneven side gaps and ensures parallel alignment with adjacent doors.
| Adjustment Type | Tool Required | Range | Common Use |
|---|---|---|---|
| Height | Screwdriver | ±2mm | Level door in frame |
| Depth | Screwdriver | ±2mm | Flush alignment |
| Lateral | Screwdriver | ±2mm | Center door in opening |
| Spring Tension | Adjustment tool | Variable | Control closing force |
JM Cabinet Solutions stocks professional-grade inset door hinges from trusted international manufacturers, providing the quality and adjustability that cabinet makers and installers throughout the Western Cape depend on for superior results. JM Cabinet Solutions offers expert guidance on selecting appropriate hardware for specific applications, whether you're building custom kitchens in Stellenbosch or renovating cabinets in Somerset West.
Material Compatibility and Substrate Considerations
Different cabinet construction methods require specific approaches to inset door hinge installation. Understanding material properties prevents installation failures and ensures long-term performance.
Solid Wood Applications
Natural wood expansion and contraction affects hinge performance. Install hinges with screws perpendicular to grain direction when possible. This orientation provides maximum holding power while accommodating seasonal movement.
Hardwoods like oak, maple, and cherry accept screws well but require pilot holes to prevent splitting. Softwoods need larger pilot holes and may benefit from thread-locking adhesives in high-stress applications.
Engineered Wood Products
Plywood, MDF, and particleboard each present unique challenges. Plywood offers excellent screw-holding but may delaminate if exposed to moisture. MDF provides uniform density but lower pull-out resistance than solid wood.
Particleboard requires special consideration. Use coarse-thread screws designed for engineered materials. Avoid overtightening, which crushes the substrate and reduces holding power. In critical applications, install threaded inserts for maximum strength.
Melamine and Laminate Surfaces
Pre-finished materials demand careful handling to prevent chipping. Use sharp drill bits and back boards when boring through laminate. Apply masking tape over drill locations to minimize surface damage.
Hinge cup installation in melamine requires precise boring to avoid exposing particleboard core. Any damage to the decorative surface remains visible in inset applications where door edges are fully exposed.
Maintenance and Longevity Strategies
Quality inset door hinges deliver decades of service when properly maintained. Regular inspection and minor adjustments prevent major issues and preserve smooth operation.
Routine Inspection Schedule
Professional installers should educate clients about basic maintenance:
- Monthly: Check door alignment and adjust if gaps appear uneven
- Quarterly: Tighten mounting screws that may have loosened
- Annually: Clean hinge mechanisms and apply light lubricant
- As needed: Address any squeaking, binding, or closing issues immediately
Soft-close mechanisms require special attention. Inspect dampers for oil leakage and verify consistent closing action. Replace worn dampers promptly to prevent damage to hinge components.
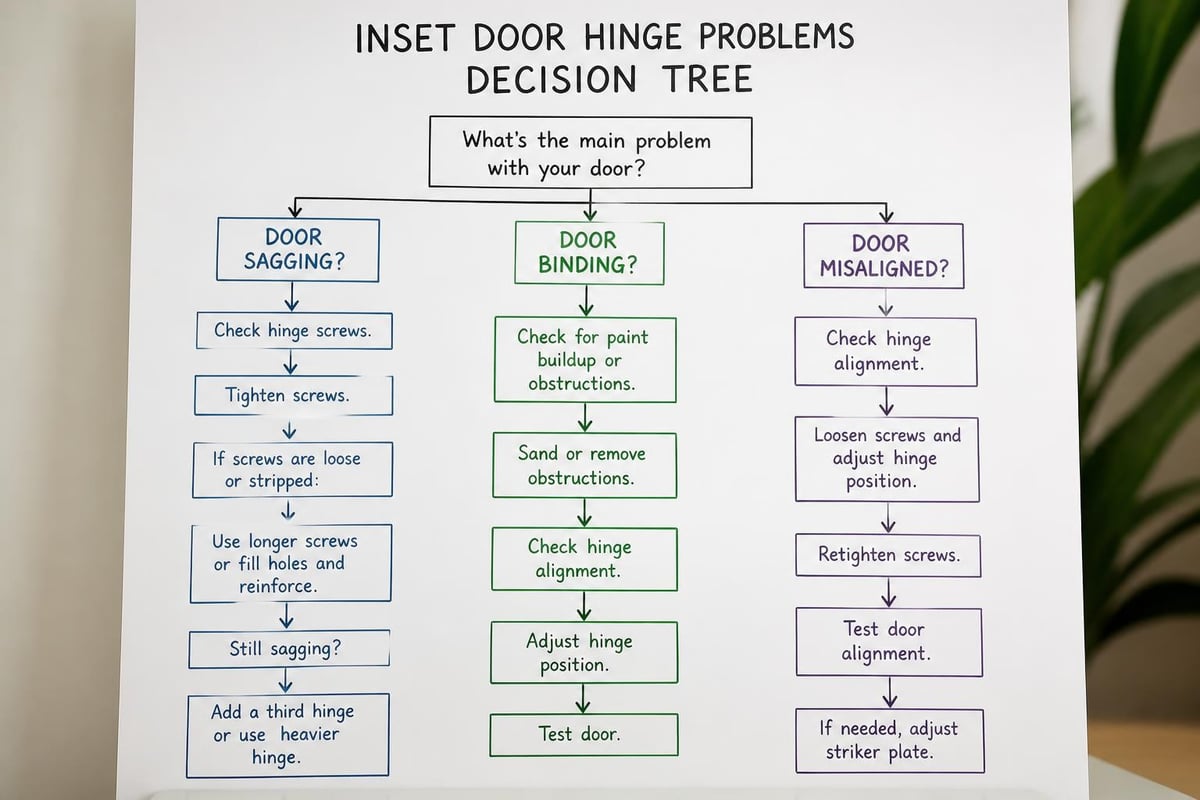
Troubleshooting Common Issues
Most inset door hinge problems resolve with simple adjustments. Systematic diagnosis identifies root causes:
| Symptom | Likely Cause | Solution |
|---|---|---|
| Door sags at top corner | Insufficient hinges or loose screws | Add hinge or tighten fasteners |
| Uneven gaps around door | Misalignment | Adjust height and lateral settings |
| Door binds when closing | Depth setting incorrect | Adjust eccentric screw outward |
| Soft-close ineffective | Worn damper | Replace hinge or damper unit |
| Squeaking during operation | Dry pivot points | Apply silicone lubricant |
Never force adjustments beyond designed limits. If maximum adjustment doesn't resolve issues, investigate cabinet squareness and door construction accuracy.
Design Considerations for Aesthetic Integration
Inset door hinges influence overall cabinet appearance significantly. Hardware selection should complement design intent while meeting functional requirements.
Visible vs. Hidden Hardware
Traditional face-frame cabinets often feature decorative butt hinges as design elements. Polished brass, antique bronze, and black iron finishes add character and reinforce period-appropriate aesthetics. These visible hinges become focal points that unify cabinetry throughout a space.
Contemporary designs typically specify concealed European hinges. The clean lines and uninterrupted surfaces created by hidden hardware emphasize minimalist aesthetics. Door fronts appear to float within frames, directing attention to wood grain, paint finishes, or decorative elements rather than hardware.
Finish Coordination
When hinges remain visible, finish coordination with other hardware elements creates cohesive design. Match hinges to drawer pulls, knobs, and decorative accessories. Consider how finishes age and patina over time, particularly with brass and bronze options.
Concealed hinges still require finish consideration. Mounting plates visible when doors open should coordinate with interior finishes. Chrome, nickel, and white powder-coat options suit different design palettes.
Comparing Inset Systems to Alternative Door Mounting Methods
Understanding how inset door hinges differ from overlay and partial overlay configurations helps clients make informed design decisions. Each approach offers distinct advantages for specific applications.
Full Overlay Applications
Full overlay doors completely cover the cabinet frame, maximizing storage accessibility and simplifying construction. These configurations require less precision during installation and accommodate greater tolerance variation. However, they create a more contemporary appearance that may not suit traditional design schemes.
Overlay hinges typically cost less than inset options and install more quickly. The trade-off comes in aesthetic refinement and the classic appearance that inset construction provides.
Partial Overlay Considerations
Partial overlay represents a middle ground, with doors covering only portion of the frame. This approach works well in face-frame construction where visible frame adds design interest. Partial overlay installation tolerances fall between full overlay and inset requirements.
Cabinet makers often choose partial overlay for projects balancing traditional aesthetics with practical construction considerations. The compromise delivers some visual refinement without demanding inset-level precision.
Why Specify Inset Construction
Despite higher costs and installation complexity, inset door hinges remain popular for premium projects. The flush appearance conveys quality craftsmanship and attention to detail. Furniture-grade construction standards apply, elevating cabinetry beyond utilitarian storage to fine woodworking.
Inset doors showcase wood joinery and frame construction. The visible craftsmanship justifies premium pricing and distinguishes custom work from mass-produced alternatives. For clients seeking heirloom-quality cabinetry, inset construction represents the pinnacle of traditional craftsmanship.
Sourcing Quality Hardware for Lasting Performance
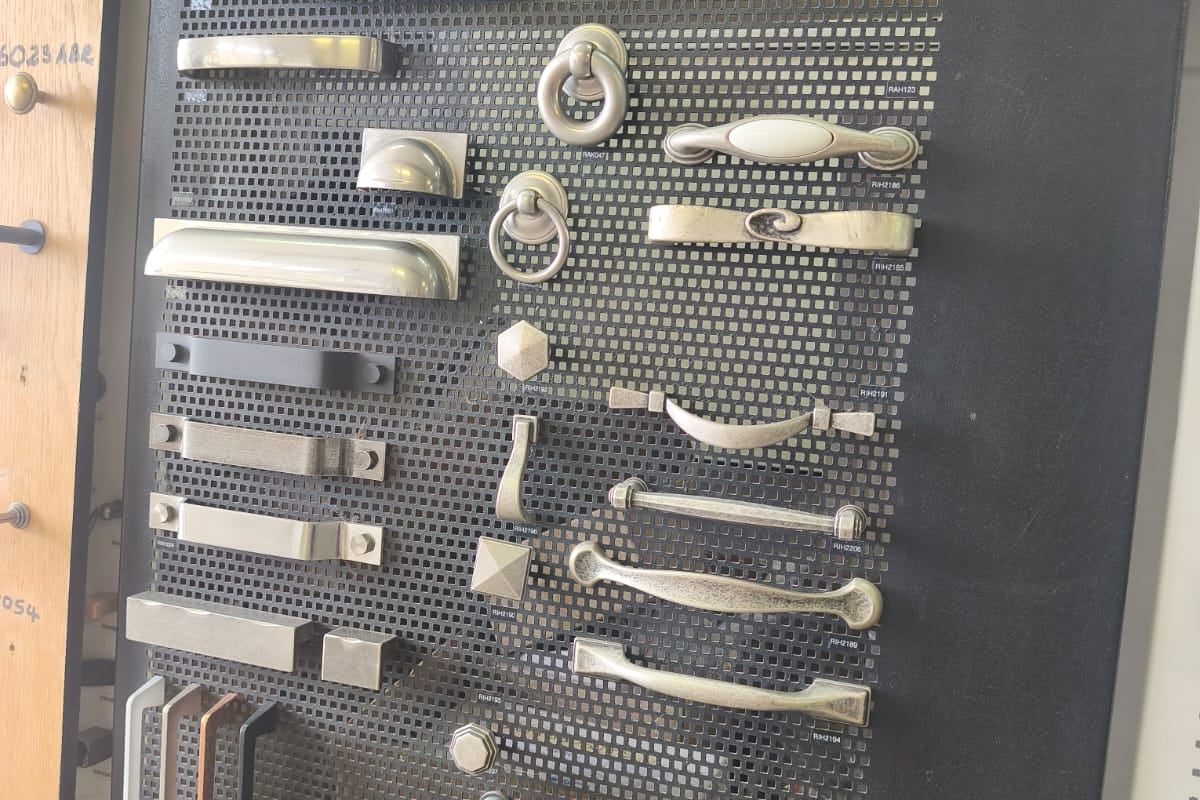
Diverse product selections demonstrate the range of inset door hinge options available. Professional installers and cabinet makers must evaluate suppliers based on product quality, technical support, and inventory availability.
Brand Reputation and Warranty Coverage
Established manufacturers provide extensive testing data, installation documentation, and warranty protection. Brands like Blum, Salice, Hettich, and Grass have earned reputations for engineering excellence and consistent quality. Their products justify premium pricing through superior performance and longevity.
Warranty terms reveal manufacturer confidence. Look for coverage extending five years or more, protecting against manufacturing defects and premature failure. Quality suppliers stand behind their products with responsive technical support and replacement part availability.
Local Availability and Support
Working with knowledgeable local suppliers provides advantages beyond product access. Expert guidance helps navigate specification challenges and identify optimal solutions for unique applications. Immediate availability reduces project delays and enables rapid response to field conditions.
Regional suppliers understand local market preferences, climate considerations, and common construction practices. This contextual knowledge proves valuable when balancing design goals with practical constraints. Established relationships enable custom ordering, volume pricing, and priority access during peak seasons.
Mastering inset door hinges separates competent installers from exceptional craftspeople, with precision selection and installation delivering cabinetry that performs flawlessly for decades. Whether you're building custom kitchens, renovating heritage homes, or creating contemporary living spaces throughout the Western Cape, the right hardware makes all the difference. JM Cabinet Solutions provides the premium cabinet fittings, expert guidance, and professional support that cabinet makers, installers, and homeowners need to achieve outstanding results. Visit our location in Strand or contact our team to discuss your specific hardware requirements and discover how quality components elevate every project.


Comments
Post a Comment